How to Lay Pavers: Essential Guide for 2025
If you’re looking to enhance your outdoor space, laying **pavers** is a fantastic investment. This comprehensive guide on how to lay pavers will provide you with smart tips and detailed steps for achieving great results in 2025. From preparing your base to laying and maintaining your pavers, we will cover all aspects, making sure you have the knowledge needed for a successful outdoor paving project.
Paver Installation Steps
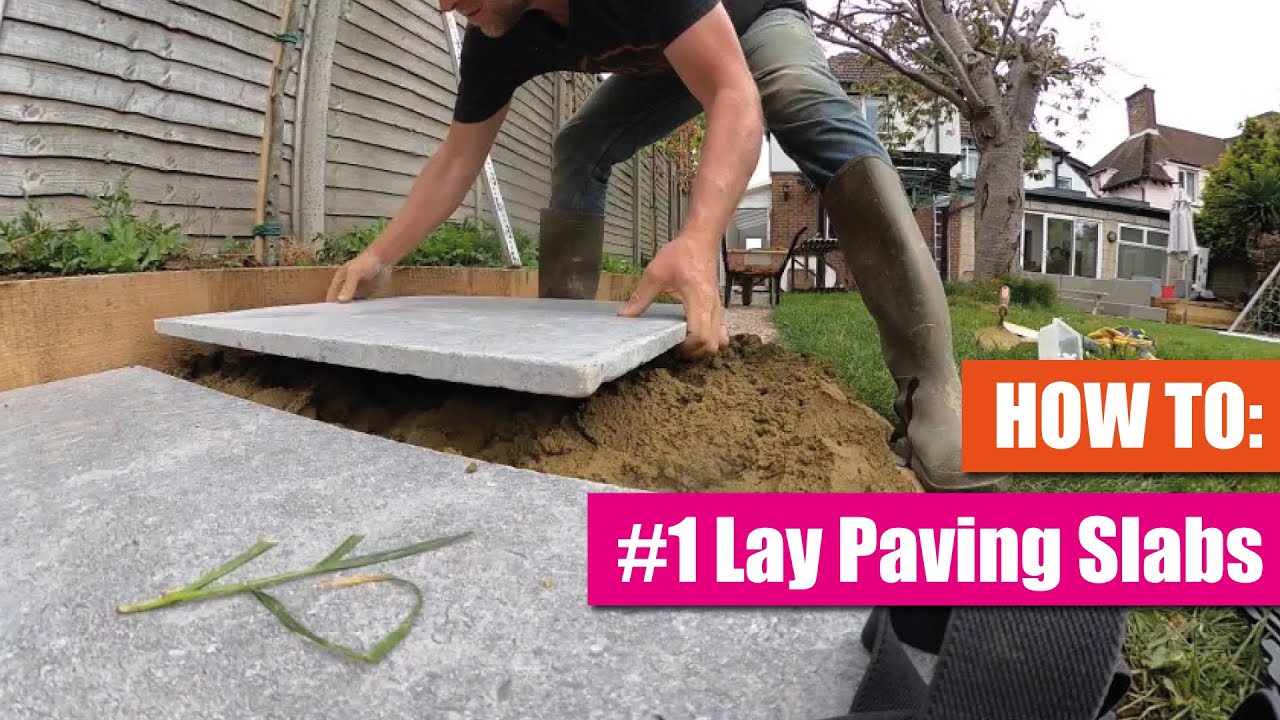
Understanding the paver installation steps is crucial for ensuring a stable and aesthetically pleasing surface. The first phase involves assessing your area and selecting the appropriate type of pavers – concrete, brick, or natural stone are common options. Following your selection, it’s critical to measure your work area accurately. Use a chalk line for precise layout planning, ensuring all corners and edges are squared. Next, **mark out the area** for digging, understanding that your depth will depend on the type of pavers and the expected traffic in the area.
Paver Base Preparation
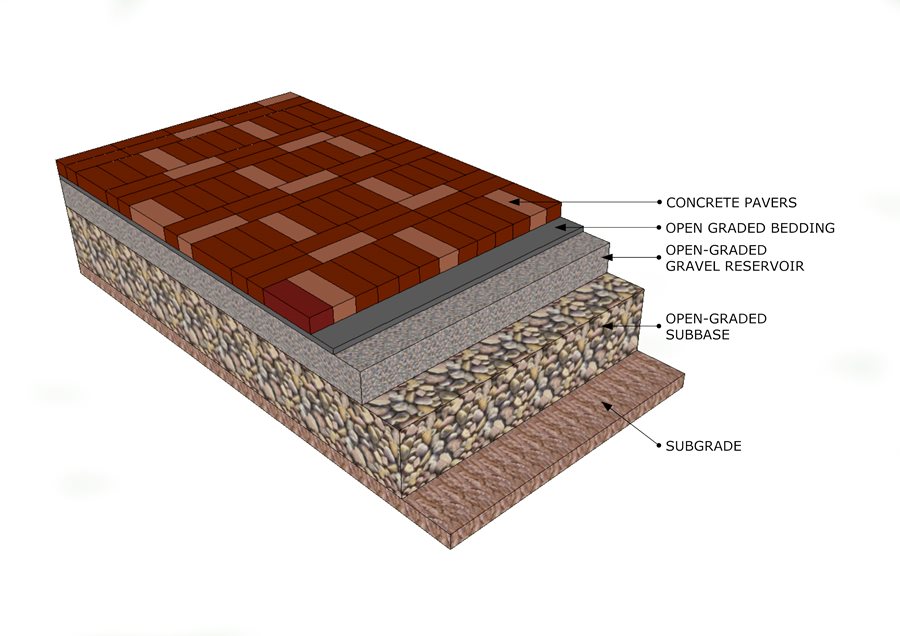
Proper paver base preparation is vital for long-lasting paving solutions. Begin by digging to a depth of approximately 6 to 8 inches, which includes the base material and the thickness of your pavers. Next, lay down a layer of gravel, about 4 to 6 inches thick, to ensure adequate drainage. Compact the soil properly, which can be done using a paver compactor or a hand tamper. This will provide a stable foundation, minimizing the chances of shifting or settling in the future.
Compacting Soil for Pavers
Compacting soil for pavers is a task that shouldn’t be overlooked. A well-compacted base helps support the weight of the pavers while preventing rusting or sinking over time. Depending on the size and coal-type of your paver project, using a mechanical compactor can dramatically enhance your results. Make sure to compact the gravel layer as well. This step, though labor-intensive, is essential in providing a strong and durable surface.
Measuring for Pavers
Accurate measuring for pavers is necessary to avoid costly mistakes and wasted materials. Utilize a measuring tape to determine the total area of the space you are working with. It’s worthwhile to allow for some extra pavers for cuts and potential breakage during handling or installation. Based on your measurements, create a detailed layout plan, marking where each type of paver will go on the worksite.
Laying Pavers in Patterns
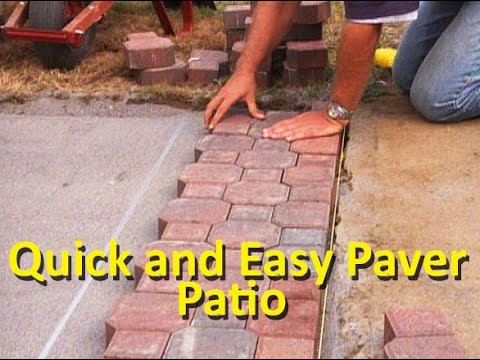
Once your base is set, you can start laying pavers in patterns. Different patterns can significantly transform the visual appeal of your space. Common designs include herringbone, running bond, and basket-weave. Laying your pavers in a specific pattern often involves figuring out where full units will go and where cuts are necessary. Ensure that the seams and joints are aligned consistently throughout the entire area for an even finish.
Cutting Pavers
As you install your pavers, you’ll often encounter the need for cutting pavers to fit specific areas. Using a wet saw can make this job easier. Wear safety goggles and gloves, as cutting pavers can cause debris to fly. For curves, a chisel and hammer can allow for creative shaping. Don’t rush this process to ensure that all cuts are even, producing a professional finish.
Paver Edge Restraints
Implementing paver edge restraints is essential to keep your installation intact. Edge restraints help prevent shifting and displacement of your pavers, particularly in areas with heavy traffic. You can choose from various materials, including plastic, metal, or even concrete curbing. Installing edge restraints along your laid paver boundaries will help maintain your design and increase longevity.
Sealing and Maintenance of Pavers
Sealing pavers enhances their durability and keeps them looking new. After the pavers are laid and the jointing sand is in place, applying a sealant can help protect against stains and weathering. Choose a high-quality sealing product suitable for your specific paver type. This process should ideally be done after the pavers have completely settled, usually a few weeks post-installation.
Paver Jointing Sand
The right choice of paver jointing sand plays a significant role in the strength of your installation. Jointing sand, which fills the gaps between pavers, helps prevent weed growth and allows for natural drainage. Sweep the sand into the joints and use a compactor to settle it firmly. Be sure to apply more sand if needed to achieve an adequate fill and ensure a rigid surface.
Maintaining Pavers
Ongoing maintaining pavers is crucial for maximizing their lifespan. Regular sweeping and occasional washing will remove dirt and prevent staining. Additionally, check for weed growth in between the joints, and use a weed killer if necessary. Periodically, you may also want to reapply a sealant, as it will keep your pavers protected and looking their best.
DIY Paver Installation: Cost and Adjectives to Consider
If you’re a homeowner considering DIY projects, understanding the paver installation cost is essential. Your costs will vary based on the type of pavers chosen, the amount of base material needed, and whether you plan to hire labor or go solo. Budgeting for extra materials is also smart. Continuous assessment will help you maintain control over the project’s financial health.
Paver Installation Tools
Before embarking on your DIY paver installation, ensure you have the right tools to streamline the process. Tools often include a paver compactor, measuring tape, a level, cutting tools, and a broom. Access to these tools will make your project much easier and reduce potential installation errors.
Common Paver Installation Mistakes
Even minor errors can lead to significant issues, so being aware of paver installation mistakes can save you time and money in the long run. Common pitfalls include improper settling of the base, neglecting edge restraint, and uneven joint filling. Thorough preparation will help reduce the risk of these mistakes and create a long-lasting driveway or patio.
Key Takeaways
- Thoroughly prepare the landscape for proper paver installation.
- Choose the right pavers based on your project requirements.
- Accurate measuring and planning can prevent costly mistakes.
- Regular maintenance will extend the life and aesthetics of your pavers.
- Utilizing proper tools makes the installation process smoother.
FAQ
1. What types of pavers are best for driveways?
When it comes to driveways, **concrete pavers** tend to be the most popular choice due to their durability and resistance to various weather conditions. However, **brick pavers** and **natural stone pavers** can also be used for their aesthetic quality, providing unique visuals that elevate the outdoor space. Be sure to consider local climate and usage when selecting paver materials.
2. How deep should I dig for paver base preparation?
For proper paver base preparation, you typically need to dig around 6-8 inches deep. This includes about 4-6 inches for the gravel and 2-3 inches for the thickness of your pavers. This ensures a sturdy foundation for different types of paved surfaces.
3. How often should I reapply paver sealant?
It’s advisable to **reapply sealant** every 2 to 5 years, depending on the wear and tear from traffic and weather exposure. Regular cleaning and upkeep will help maintain functionality and appearance, making it essential to routinely check your paved surface.
4. What tools do I need for a successful paver installation?
Essential paver installation tools** include a paver compactor, cutting tools, a level, measuring tape, and a broom. Having these at your disposal will ensure that your project runs smoothly and efficiently.
5. Can I install pavers over existing concrete?
Yes! Installing pavers over existing concrete is possible and often simplifies the process. However, ensure that the **concrete surface** is in good condition and capable of supporting the pavers to prevent future shifting or settling.
6. What are the advantages of using permeable pavers?
Permeable pavers offer numerous advantages, including improved **drainage** as they allow water to seep through, reducing erosion and runoff. They are ideal for eco-friendly projects and contribute positively to the local environment by minimizing surface water pooling.
7. How do I prevent weeds from growing between my pavers?
One effective strategy for preventing weeds between pavers involves using **paver jointing sand** specifically designed for this purpose. Additionally, applying a weed prevention chemical and regular cleaning can further minimize the chances of weed growth, keeping your paved surfaces looking pristine.